How Do I Get a Smooth Finish With Touch-Up Paint Tips
Getting a smooth finish with touch-up paint is easier than most car owners think. You just need the right touch-up paint products, proper surface prep, and a little patience. This guide walks you through every step from choosing the right color match to final polishing. Whether you are fixing a small paint chip or a larger scratch, these techniques will help you achieve a flawless smooth finish every time.
Key Takeaways
- Surface prep is everything: Cleaning and sanding the area properly ensures your touch-up paint adheres well and looks natural.
- Use the right products: Matching your car’s color code and choosing quality touch-up pens, pens, or spray cans makes a huge difference.
- Thin layers win: Applying multiple thin coats instead of one thick coat prevents drips and uneven texture.
- Blending is key to invisibility: Wet sanding and buffing help blend the repaired area with the surrounding paint seamlessly.
- Polishing adds the final shine: A good polishing compound and buffer bring back the gloss and protect your repair.
- Avoid common mistakes: Skipping primer, applying paint in direct sunlight, or rushing the drying process ruins your results.
- Patience pays off: Letting each layer dry fully before moving to the next step guarantees the best smooth finish with touch-up paint.
📑 Table of Contents
- Why Touch-Up Paint Often Leaves a Rough Finish
- Preparing Your Car’s Surface for Touch-Up Paint
- Choosing the Right Touch-Up Paint Products
- Applying Touch-Up Paint for a Smooth Finish
- Blending and Leveling the Painted Area
- Protecting and Maintaining Your Smooth Finish
- Common Mistakes to Avoid With Touch-Up Paint
- Expert Tips for a Flawless Smooth Finish
- When to Seek Professional Help
- Conclusion
Why Touch-Up Paint Often Leaves a Rough Finish
You buy a bottle of touch-up paint. You apply it to a chip on your door. And then you look at it. The finish is rough, bumpy, and way too shiny compared to the rest of the panel. Sound familiar? You are not alone. Millions of car owners deal with this problem every single day.
The truth is, getting a smooth finish with touch-up paint is not just about slapping paint on a scratch. There is a whole process involved. And once you understand why rough finishes happen, you can avoid the mistakes that cause them.
Most rough finishes come from one of three things. First, the surface was not cleaned properly before painting. Second, the paint was applied too thick in one go. Third, the area was not sanded and blended correctly afterward. Each of these problems has a simple fix. And this guide will show you exactly how to do it.
Automotive touch-up work does not need to be intimidating. With the right approach, anyone can achieve professional-looking results at home. You do not need a fancy paint booth or expensive equipment. You just need knowledge, the right tools, and a steady hand.
The Science Behind Paint Texture
Here is something most people do not think about. Car paint is made of multiple layers. There is the base coat, which gives your car its color. Then there is the clear coat, which protects the base coat and gives it that deep gloss. When you apply touch-up paint, you are usually only touching the base coat layer.
The clear coat is what makes the surface feel smooth to the touch. Without it, the touch-up area will feel rough and look dull. That is why many touch-up repair methods involve applying a clear coat after the color paint dries. Understanding this layered structure helps you see why each step in the process matters so much.
Preparing Your Car’s Surface for Touch-Up Paint
Surface preparation is the most important step in the entire process. If you skip this step or do it poorly, nothing else will matter. Your touch-up paint will not adhere properly, and the finish will look terrible. Take your time with preparation, and the rest of the process becomes much easier.
Cleaning the Damaged Area
Start by washing the area around the chip or scratch. Use a gentle car wash soap and warm water. A soft microfiber cloth works great for this. You want to remove all dirt, grease, and wax from the repair zone. Any contamination on the surface will prevent the paint from bonding correctly.
After washing, use a wax and grease remover. Spray it directly onto the damaged area and wipe it clean with a fresh cloth. This removes any remaining oils or residue that your eyes might not even see. Let the area dry completely before moving to the next step.
Sanding for Better Paint Adhesion
Light sanding creates a slightly rough surface that helps the touch-up paint grip the panel. Use a fine-grit sandpaper, around 2000 to 3000 grit. Sand the damaged area gently in a circular motion. You are not trying to remove paint here. You are just creating a texture that the new paint can bond with.
After sanding, wipe the area with a clean, damp cloth to remove all dust particles. This step is easy to overlook but absolutely essential. Even tiny dust particles left on the surface will create bumps in your final finish.
Applying Primer When Needed
If the chip goes down to bare metal or exposes primer, you need to apply a new coat of primer before the color paint. Primer protects against rust and gives the color paint something to grip. Apply a thin layer of primer with a small brush or a touch-up pen. Let it dry fully according to the product instructions.
Some touch-up kits come with primer already included. Check your kit before buying a separate one. Using the right primer for your specific paint system ensures the best paint adhesion and long-lasting protection.
Choosing the Right Touch-Up Paint Products
Not all touch-up paint products are created equal. Using the wrong product or a low-quality paint can ruin your chances of getting a smooth finish. Take a moment to understand your options and choose wisely.
Finding Your Car’s Color Code
Every vehicle has a color code located somewhere on the body. Check the driver’s side door jamb, the glove box, or the underhood area. The color code tells you the exact paint formula your car was painted with at the factory. This is the single most important piece of information for any touch-up job.
Once you have the color code, you can order a touch-up paint pen, a bottle of touch-up paint, or a spray can. Many online retailers and auto parts stores carry these. Make sure you buy from a reputable source that guarantees color match accuracy.
Touch-Up Pen vs. Spray Can vs. Brush-On Paint
Each product type has its own strengths. Touch-up pens are great for small chips. They are precise and easy to control. Spray cans cover larger areas more evenly and are better for bigger repairs. Brush-on paint gives you the most control but requires more skill to apply smoothly.
Here is a quick comparison to help you decide:
| Product Type | Best For | Ease of Use | Finish Quality |
|---|---|---|---|
| Touch-Up Pen | Small chips and dots | Very Easy | Good for tiny spots |
| Brush-On Paint | Medium scratches and chips | Moderate | Excellent with practice |
| Spray Can | Larger areas and full panels | Easy | Very Good |
| Touch-Up Bottle with Needle | Precision work on small chips | Moderate | Excellent |
For most small repairs, a touch-up pen or a small bottle with an applicator needle works perfectly. If the damage is larger, consider using a spray can for better coverage and a more even finish.
Applying Touch-Up Paint for a Smooth Finish
This is where the magic happens. How you apply the paint determines a lot about the final result. Rushing this step is the number one reason people end up with rough, bumpy repairs.
Applying Thin, Even Coats
The golden rule of touch-up paint is this: thin coats are always better than thick coats. Apply a very thin layer of paint to the damaged area using the applicator provided. If you are using a pen, press gently and let the paint flow onto the chip. Do not glob it on.
Wait for the first coat to dry before applying the next one. Most touch-up paints need about 15 to 30 minutes between coats. Apply three to four thin coats rather than one thick one. Each layer should be barely visible. This approach builds up the paint gradually and reduces the risk of drips and uneven texture.
Working in the Right Conditions
Temperature and humidity matter a lot. The best conditions for applying touch-up paint are between 60 and 75 degrees Fahrenheit with low humidity. Avoid painting in direct sunlight. The heat causes the paint to dry too fast, which leads to an uneven, rough surface.
Also, avoid painting on very humid or rainy days. Moisture in the air can cause the paint to bubble or dry with a rough texture. A shaded garage or a covered outdoor area works best for this job.
Filling Deep Chips and Scratches
For deeper chips that go down to bare metal, you may need to fill the area before applying color paint. Use a filler primer or a spot putty designed for automotive use. Apply a small amount, let it dry, and sand it smooth with fine-grit sandpaper.
Once the filler is smooth, you can proceed with the color paint. Fill deep chips in stages. Do not try to fill a deep chip in one application. Build it up slowly with multiple thin layers of filler and paint for the best results.
Blending and Leveling the Painted Area
Once the paint is fully dry, you need to blend the repair area with the surrounding paint. This step is what separates a visible repair from one that practically disappears.
Wet Sanding for a Level Surface
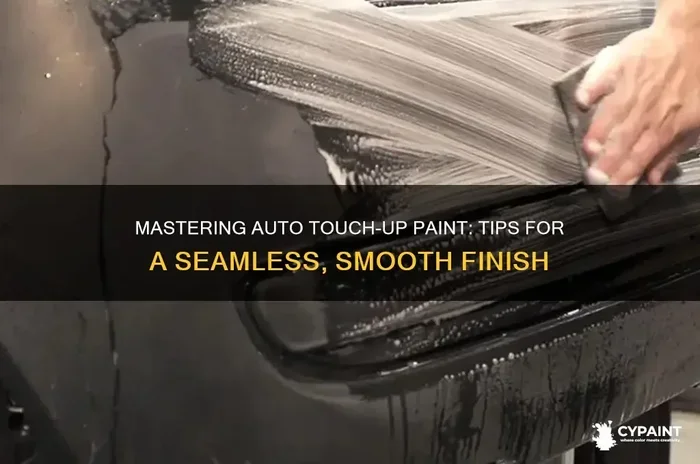
Wet sanding is the technique used to level the painted area and make it flush with the surrounding panel. Use a sanding block with 2000-grit or higher sandpaper. Dip the sandpaper in water and add a few drops of car wash soap to create lubrication.
Sand the painted area gently using straight, overlapping strokes. Keep the area wet at all times. Check your progress frequently by running your finger over the surface. You want it to feel completely level and smooth with the rest of the panel.
Be careful not to sand too aggressively. You are not trying to remove paint. You are just leveling the surface. If you sand through the paint down to the primer or bare metal, you will need to start the painting process over again.
Buffing and Polishing the Repair
After wet sanding, the area will look dull and matte. That is completely normal. The next step is to restore the gloss. Apply a polishing compound to the repaired area and use a soft buffing pad or a microfiber cloth to work it in circular motions.
Polishing removes the fine scratches left by sanding and brings back the shine. You may need to apply a second coat of clear coat before polishing if the area still looks uneven. Let the clear coat dry for at least 24 hours before buffing.
Using a Paint Correction Compound
For the best results, use a paint correction compound after the polishing compound. These products are designed to remove minor imperfections and restore clarity to the clear coat. Apply a small amount to a foam pad and work it into the repaired area with light pressure.
Wipe away the residue with a clean microfiber cloth. You should see a noticeable improvement in the shine and smoothness of the repair. The area should now blend in with the surrounding paint almost seamlessly.
Protecting and Maintaining Your Smooth Finish
You have put in the work to get a smooth finish. Now you need to protect it. A few simple maintenance steps will keep your repair looking great for years to come.
Applying a Wax or Sealant
Once the repair is complete and polished, apply a coat of car wax or a paint sealant over the entire panel. This protects the new paint and helps it match the surrounding finish over time. Use a high-quality automotive wax and apply it by hand or with a dual-action polisher.
Waxing also helps blend the repair area with the rest of the panel by giving the entire surface a uniform level of protection and shine. Reapply wax every few months to maintain the finish.
Preventing Future Paint Chips
The best way to keep your smooth finish looking great is to prevent new chips from forming. Consider applying a paint protection film to high-impact areas like the front bumper and hood. Clear bra films are transparent and virtually invisible, and they absorb the impact of road debris.
Regular washing and waxing also help. A good coat of wax acts as a barrier between your paint and the elements. It reduces the chances of new chips, scratches, and oxidation that can make your repair stand out again.
Common Mistakes to Avoid With Touch-Up Paint
Even with the best instructions, mistakes happen. Here are the most common errors car owners make when doing touch-up paint repairs, and how to avoid them.
- Skipping surface preparation: Dirty or greasy surfaces cause paint to peel and bubble. Always clean and sand before painting.
- Applying paint in direct sunlight: Heat makes paint dry too fast and creates a rough, uneven texture. Always work in a shaded, cool area.
- Using too much paint at once: Thick coats trap moisture underneath and take forever to dry properly. Thin layers every time.
- Not letting paint dry fully: Rushing between coats causes smudging and poor adhesion. Follow the drying times on the product label.
- Skipping the clear coat: Without clear coat, the repair will look dull and feel rough. Always apply clear coat after the color paint dries.
- Using the wrong color match: Even a slight color mismatch makes the repair obvious. Always verify your color code before purchasing paint.
Expert Tips for a Flawless Smooth Finish
Here are some pro-level tips that make a real difference in the quality of your touch-up paint repairs.
- Use a bright LED light to inspect your work. A flashlight or a detailer’s LED lamp helps you see imperfections that are invisible in normal lighting. Check the surface at multiple angles.
- Keep a spray bottle of water nearby. Mist the area lightly when sanding or buffing. This keeps the surface lubricated and prevents scratching.
- Practice on a hidden area first. If you are new to touch-up paint, practice your technique on a discreet spot before working on a visible area. This builds confidence and skill.
- Use a toothpick or needle for tiny chips. For pinpoint chips, a toothpick dipped in touch-up paint gives you much better control than a pen or spray can.
- Be patient between steps. The biggest secret to a smooth finish is patience. Let each layer dry completely. Do not rush the process.
Following these tips consistently will elevate your touch-up repairs from basic to professional quality. The difference is noticeable the moment you run your hand over the finished surface.
When to Seek Professional Help
There is no shame in admitting that some repairs are beyond a DIY fix. If the damage covers a large area, if the paint is peeling over a wide section, or if the repair is on a curved panel that is difficult to blend, it may be worth visiting a professional detailer or body shop.
Professionals have access to paint matching systems, spray equipment, and paint booths that deliver flawless results every time. For minor chips and small scratches, DIY touch-up works great. For larger damage, a professional can save you time and deliver a finish that is nearly impossible to achieve at home.
The good news is that even if you do seek professional help for a major repair, knowing how to handle small touch-ups yourself saves you money and keeps your car looking great between visits to the shop.
Conclusion
Getting a smooth finish with touch-up paint is a skill anyone can learn. The key is to follow each step carefully and never rush the process. Start with proper surface preparation, choose the right products for your vehicle, apply thin and even coats, and finish with wet sanding and polishing. These steps work together to create a repair that looks factory-fresh.
Remember that patience is your best tool. Let the paint dry between coats. Take your time with sanding and buffing. And always protect your repair with wax or sealant afterward. With practice, your touch-up paint repairs will become nearly invisible, and your car will look its best for years to come.
The effort you put into learning these techniques pays off every time you look at your car and see a smooth, flawless finish where a chip or scratch used to be. Keep this guide handy, gather your supplies, and enjoy the satisfaction of a job well done.
Frequently Asked Questions
Can I use touch-up paint on a rusted area?
Yes, but you must treat the rust first. Use a rust converter or sand away the rust completely before applying primer and paint. Applying touch-up paint over active rust will cause the repair to fail quickly and spread the corrosion underneath.
How long should I wait before waxing after a touch-up repair?
Wait at least 30 days before applying wax to a fresh touch-up repair. The paint and clear coat need this time to fully cure and harden. Waxing too early can trap moisture and damage the finish.
What is the best grit sandpaper for wet sanding touch-up paint?
2000-grit or 3000-grit sandpaper is ideal for wet sanding touch-up paint repairs. These fine grits level the surface without removing too much paint. Start with 2000-grit and move to 3000-grit for an even smoother result.
Will touch-up paint match my car’s color perfectly?
Most quality touch-up paint kits provide an excellent color match when you use your vehicle’s exact color code. However, paint fades over time, so a repair done years after purchase may be slightly more noticeable. Applying the repair to a small, discreet area first helps you check the match.
Can I drive my car immediately after a touch-up paint repair?
You can drive your car, but avoid washing it or exposing the repair to rain for at least 48 hours. The paint needs time to harden and bond properly. Keep the car in a covered or shaded area while the paint cures fully.
How do I fix a touch-up paint job that turned out rough?
Let the paint dry completely, then wet sand the area with 2000-grit sandpaper until it is level. Polish the area with a compound and apply a new coat of clear coat if needed. Often, one careful correction pass is enough to fix a rough touch-up repair and restore a smooth finish.
=== CONCLUSION ===
Getting a smooth finish with touch-up paint comes down to preparation, technique, and patience. By following the steps outlined in this guide, you can repair chips and scratches like a professional without spending a fortune at a body shop. From choosing the right touch-up paint products to wet sanding and polishing, every step plays a role in the final result.
Start with a clean surface. Apply thin coats. Blend and polish carefully. And always protect your work with wax or sealant. These habits ensure your repairs look great and last for years. The next time your car gets a chip or scratch, you will know exactly what to do. Grab your supplies, follow this guide, and enjoy the satisfaction of a flawless, smooth finish that makes your car look as good as new.