Can I Open My Hood Without the Latch Easy Fix Inside
Yes, you can open your hood without the latch, and it is simpler than most drivers think. Whether your hood latch is broken, stuck, or damaged, there are practical workarounds and replacement methods that get you back on the road fast. This guide walks you through every step, from emergency tricks to full hood latch repair, so you never get stranded again.
Have you ever stood in front of your car, hand on the hood, and realized the latch just will not cooperate? It is one of those frustrating moments that can ruin your morning. Maybe the handle broke, the cable snapped, or the whole mechanism simply seized up from rust and age.
The good news is that you do not need a mechanic or a brand-new part to get that hood open right now. Opening your hood without the latch is something many car owners can do with basic tools and a little know-how. This guide covers every method, every tool, and every tip you need to handle this situation like a pro.
We will walk you through emergency tricks, full replacement steps, and simple ways to prevent the problem from ever happening again. Whether you are dealing with a broken hood latch or just want to be prepared, this article has you covered.
Key Takeaways
- Emergency access is possible: You can open your hood using a latch bypass or manual release method when the latch fails.
- Common causes include wear and rust: A broken hood latch spring, corroded cable, or worn hinge often causes latch failure.
- Basic tools make the fix easy: A socket set, pliers, wire hanger, and replacement latch can handle most situations.
- Replacement is affordable: A new hood latch mechanism costs between $20 and $80, depending on your vehicle.
- Prevention saves time and money: Regular cleaning, lubrication, and inspection keep your hood latch working smoothly for years.
- Know when to call a pro: If the latch damages the hood or the cable frays beyond repair, seek professional help.
📑 Table of Contents
- Why Your Hood Latch Might Fail You
- How to Open Your Hood Without the Latch
- Tools You Will Need for This Fix
- Step-by-Step Hood Latch Replacement
- Preventing Hood Latch Problems Before They Start
- When to Call a Professional
- Common Mistakes to Avoid
- Expert Insights on Hood Latch Maintenance
- Key Takeaways
Why Your Hood Latch Might Fail You
Understanding why a hood latch stops working helps you pick the right fix. Most latch failures come from a few common culprits. Let us look at each one so you can diagnose the issue quickly.
Wear and Tear Over Time
Every time you open and close your hood, the latch mechanism experiences stress. The spring weakens. The pawl wears down. After years of daily use, these small parts simply wear out. A hood latch mechanism that has seen 100,000 miles or more often shows signs of fatigue. You might notice the latch feels loose or does not click firmly anymore.
Rust and Corrosion
Your engine bay gets hot, then cold, then hot again. Moisture collects, especially in winter. Over time, this creates rust on the latch, the cable, and the hinge points. Rust acts like sandpaper inside the mechanism, grinding everything down until the latch seizes completely. If you live near the coast or use road salt, this problem hits even harder.
Broken Hood Latch Cable
The cable connects your interior handle to the latch under the hood. When this cable frays or snaps, pulling the handle inside the cabin does nothing. You will hear a loose feel or no resistance at all. A hood cable replacement is usually straightforward, but sometimes the cable housing also corrodes, making the fix a bit more involved.
Child Safety Lock Malfunction
Many modern vehicles have a secondary latch or safety lock that prevents the hood from flying open while driving. If this mechanism jams or breaks, it can also block the primary latch from releasing properly. This is a less common issue, but it happens, especially on older vehicles or those that have seen accidents.
Hood Hinge Damage
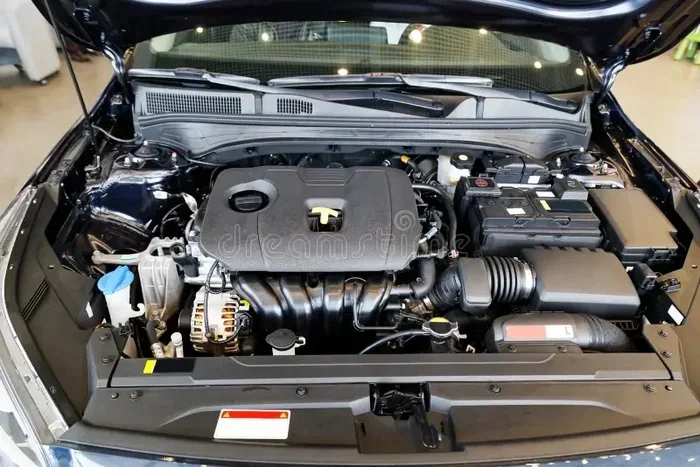
Sometimes the problem is not the latch itself but the hinge. A bent or damaged hinge changes the alignment of the entire hood. When the hood does not sit correctly, the latch cannot engage or release properly. This creates a situation where even a working latch cannot do its job.
How to Open Your Hood Without the Latch
So your latch is not working, and you need to get under that hood. Here are the most reliable methods to open your hood without a functioning latch. Try them in order, starting with the simplest approach.
Method 1: Use the Emergency Hood Release Cable
Most vehicles have a backup cable that runs from the front of the car to the latch mechanism. This cable is your emergency release. Look for a small plastic cover on the front of the vehicle, just behind the grille or below the bumper. Pop off the cover, pull the cable with pliers or your hand, and the latch should release.
Quick tip: If you cannot find the cable, check your owner manual. It will show you the exact location for your specific vehicle make and model.
Method 2: Reach Through the Grille
On many cars, you can reach through the front grille and manually push the latch lever from the outside. You will need to feel around the latch area with your hand. The lever usually looks like a small metal arm connected to the latch body. Push it toward the driver side of the vehicle, and the hood should pop up.
This method works best when the latch is stuck in the closed position but the internal mechanism is still intact. You may need a flashlight to see clearly, especially on darker vehicles.
Method 3: Use a Wire Hanger or Long Tool
Straighten a wire coat hanger and create a small hook at one end. Feed it through the grille opening or any gap near the latch area. Hook the latch release lever and pull gently. This technique works well when you cannot reach the latch by hand.
Be careful not to scratch the paint or damage the grille. Wrap the tip of the wire with a cloth if needed. A long screwdriver or needle-nose pliers can also work for this method.
Method 4: Lift the Hood Manually Using the Prop Rod
If the latch is completely jammed and you cannot release it, you may need to force the hood open slightly. Once you create a small gap, insert the hood prop rod to hold it up. This is a more aggressive approach and should only be used as a last resort.
Place a towel or rag along the hood edge to prevent scratches. Gently pry the hood upward with your hands or a flat tool. Once you have enough clearance, secure the hood with the prop rod and inspect the latch.
Method 5: Remove the Latch Bolts
Every latch is held in place by bolts or nuts. If all else fails, you can remove the latch assembly entirely. This gives you full access to the hood release mechanism and lets you manually push the latch open from underneath.
You will need a socket wrench set and about 15 minutes. Remove the bolts, pull the latch out, and use a flathead screwdriver to push the release pawl. The hood will pop open immediately.
Tools You Will Need for This Fix
Having the right tools makes any hood latch repair faster and safer. Here is what you should gather before you start working.
- Socket wrench set — for removing latch bolts and access panels
- Needle-nose pliers — for gripping small cables and levers
- Wire coat hanger — for emergency latch release
- Flathead screwdriver — for prying and pushing release mechanisms
- Flashlight — for seeing into tight engine bay spaces
- Replacement hood latch — if the old one is beyond repair
- Penetrating oil (like WD-40) — for freeing rusted parts
- Rag or towel — for protecting the hood paint
- Safety gloves — to protect your hands from sharp edges
You do not need an expensive toolbox for this job. Most of these tools are already in a basic home garage. A hood latch replacement kit costs very little and is worth keeping in your trunk for emergencies.
Step-by-Step Hood Latch Replacement
If your latch is damaged beyond repair, replacing it is the best long-term solution. The good news is that this is a straightforward DIY job that most car owners can complete in under an hour.
Step 1: Get the Right Replacement Latch
Look up your vehicle by make, model, and year. You can find the correct hood latch replacement part online or at any auto parts store. Make sure you get the full latch assembly, not just the handle. The assembly includes the latch body, spring, and release mechanism.
Step 2: Disconnect the Hood Release Cable
Open the hood if you can, or use one of the bypass methods above. Locate the cable end connected to the latch. Use pliers to squeeze the cable clip and pull the cable free. Set the cable aside carefully so you can reconnect it later.
Step 3: Remove the Old Latch
Using your socket wrench, remove the bolts holding the latch in place. There are usually two to four bolts depending on your vehicle. Once the bolts are out, pull the latch assembly free. You may need to wiggle it a bit if rust has built up around the mounting points.
Quick tip: Take a photo of the old latch before you remove it. This makes installation of the new one much easier because you can reference the bolt positions and cable routing.
Step 4: Install the New Latch
Position the new hood latch mechanism in the same spot as the old one. Insert the bolts and hand-tighten them first. Then use the socket wrench to snug everything down. Do not overtighten, as this can crack the mounting bracket or strip the threads.
Step 5: Reconnect the Cable and Test
Reattach the hood release cable to the new latch. Make sure the cable has proper tension — not too loose and not too tight. Close the hood, pull the interior handle, and listen for the latch to click. Open the hood again to confirm everything works smoothly.
If the latch still does not release, check the cable adjustment. Sometimes the cable needs a slight length adjustment to work correctly with a new latch. This is a simple fix that takes about five minutes.
Preventing Hood Latch Problems Before They Start
The best way to deal with a hood latch stuck open or broken latch is to prevent the problem entirely. A few simple habits can keep your latch working perfectly for years.
Clean the Latch Regularly
Once every few months, open the hood and inspect the latch area. Wipe away any dirt, debris, or road grime. Use a damp cloth and let it dry completely. Clean latch components last much longer than neglected ones.
Lubricate Moving Parts
Apply a thin layer of white lithium grease or silicone lubricant to the latch pivot points and the cable housing. This prevents rust and keeps the mechanism moving freely. Reapply every six months or after washing your vehicle.
Check the Cable Tension
A loose cable causes the latch to feel sloppy and unreliable. Periodically pull the interior hood handle and feel for resistance. If the handle feels loose or travels too far, the cable needs tightening. Most vehicles have an adjustment bolt near the latch that lets you fine-tune the cable tension.
Inspect the Hood Hinges
Misaligned hinges put extra stress on the latch. Check that the hood sits evenly when closed. If the hood appears tilted or uneven, adjust the hinge supports. This is usually just a matter of loosening the hinge bolts, repositioning the hood, and retightening.
Avoid Slamming the Hood
It is tempting to slam the hood shut for a satisfying close, but this habit damages the latch over time. Always close the hood firmly but gently. Let the weight of the hood do the work, not a heavy push from your hand.
When to Call a Professional
Most hood latch repair jobs are simple and affordable. But some situations call for a trained mechanic. Here is when you should stop the DIY approach and seek professional help.
- The latch has damaged the hood: If the broken latch bent the hood or cracked the frame, a professional needs to assess the structural damage.
- The cable is frayed deep inside the housing: Sometimes the cable breaks inside the protective housing, which requires more complex replacement work.
- You cannot find the emergency release: Some vehicles hide the release cable in hard-to-reach spots. A mechanic has the tools and experience to locate it quickly.
- Electrical latch systems: Newer vehicles with electronic hood release systems are more complex and should be handled by a professional.
A professional hood latch bypass or repair typically costs between $50 and $150 for labor, plus the cost of any replacement parts. This is a reasonable price for peace of mind, especially if the DIY route feels too risky for your specific vehicle.
Common Mistakes to Avoid
When dealing with a stubborn hood latch, it is easy to make mistakes that make the problem worse. Here are the most common errors and how to avoid them.
- Forcing the hood open without a gap: Yanking on the hood when the latch is stuck can bend the hinges or crack the windshield. Always create a small gap first.
- Using the wrong lubricant: WD-40 is a cleaner, not a long-term lubricant. Use white lithium grease or silicone spray for lasting protection.
- Overtightening the bolts: Cranking the bolts too hard strips the threads and weakens the mounting point. Tighten until snug, then add a quarter turn.
- Ignoring the cable: Sometimes the latch itself is fine, but the cable is the real problem. Always check the cable before replacing the latch.
- Skipping the safety latch: If your vehicle has a secondary safety latch, make sure it is fully disengaged before trying to open the hood.
Expert Insights on Hood Latch Maintenance
Regular maintenance is the single best thing you can do for your hood latch. A quick inspection during every oil change takes less than two minutes and catches small problems before they become big ones. Pay attention to any unusual sounds when you pull the release handle — clicking, grinding, or looseness all signal early warning signs.
Many drivers ignore their hood latch until it fails completely. This reactive approach leads to more expensive repairs and more frustration. A proactive maintenance routine keeps your hood latch spring strong and your mechanism running smoothly. Think of it as a five-minute investment that saves you hours of hassle down the road.
Key Takeaways
- Multiple methods exist to open your hood without a working latch: From emergency cables to wire hangers, you have options for every situation.
- Rust, wear, and cable failure are the top causes of latch problems: Regular cleaning and lubrication prevent most of these issues.
- Replacing a hood latch is a simple DIY job: With basic tools and a new latch, you can complete the replacement in under an hour.
- Prevention is easy and affordable: A few minutes of maintenance every few months keeps your latch in great shape.
- Know your limits: If the damage is beyond a simple latch fix, a professional mechanic can handle it safely and affordably.
Opening your hood without the latch is not just possible — it is something every car owner should know how to do. A broken hood latch does not have to leave you stranded or stressed. With the methods and tips in this guide, you can handle the situation confidently and get back on the road quickly.
Start by trying the simplest bypass methods. If the latch itself is the problem, a replacement is affordable and easy. And once your new latch is installed, stick to a regular maintenance routine to keep everything working smoothly for years to come. Your hood latch is a small part, but it plays a big role in keeping your engine protected and your vehicle running right.
Take a few minutes today to inspect your hood latch. Clean it, lubricate it, and make sure the cable tension is correct. This small habit could save you from a major headache tomorrow. You will be glad you did.
Frequently Asked Questions
Can I drive my car with a broken hood latch?
Technically yes, but it is not recommended. A broken latch can cause the hood to open unexpectedly while driving, which is extremely dangerous. Have the latch repaired or replaced as soon as possible before driving long distances.
How much does it cost to replace a hood latch?
A replacement hood latch mechanism typically costs between $20 and $80 for the part itself. If you do the work yourself, you save on labor. Professional installation adds $50 to $150 depending on your location and vehicle type.
What causes a hood latch to break?
The most common causes are rust, wear over time, a broken cable, and age. Vehicles in coastal areas or those exposed to road salt experience latch failure more often. Regular maintenance greatly reduces the risk of a broken latch.
Can I use WD-40 to fix a stuck hood latch?
WD-40 can help free a stuck latch temporarily by penetrating rust and grime. However, it is not a long-term lubricant. After using WD-40, apply white lithium grease or silicone spray for lasting protection and smooth operation.
How do I find the emergency hood release cable?
The emergency release cable is usually located behind a small plastic cover on the front of the vehicle, near the grille or below the bumper. Check your vehicle owner manual for the exact location, as it varies by make and model.
How often should I inspect my hood latch?
A quick inspection during every oil change, which is roughly every 3,000 to 5,000 miles, is ideal. Look for signs of rust, check cable tension, and listen for unusual sounds when releasing the hood. This simple habit catches problems early.