How to Care for Your Auto Window Tint the Right Way
Taking care of your auto window tint doesn’t have to be complicated. This guide covers everything from the first 30 days after installation to daily cleaning routines that keep your tint looking sharp. You’ll learn the right products to use, mistakes to avoid, and expert tips that extend the life of your tint for years to come.
Your auto window tint does more than just make your car look cool. It blocks harmful UV rays, reduces heat inside your vehicle, and adds a layer of privacy that many car owners value deeply. But here’s the thing most people don’t realize. Tint needs proper care to last. Without the right maintenance routine, even the best-quality tint can peel, bubble, or fade within just a few years.
Whether you just got your car tinted or you’ve been driving with tint for a while, this guide will show you exactly how to care for your auto window tint the right way. We’ll walk you through the curing period, daily cleaning habits, common mistakes, and everything else you need to know. By the end, you’ll feel confident keeping your tint in top shape for years to come.
The truth is, maintaining your tint is surprisingly simple. It doesn’t require expensive products or hours of work each week. A few smart habits and the right cleaning approach make all the difference. Let’s dive into the details so you can protect your investment and enjoy your tint for as long as possible.
Key Takeaways
- Wait 30 days before rolling down your windows: This lets the adhesive cure properly and prevents peeling or bubbling.
- Use ammonia-free cleaners only: Ammonia breaks down the tint film over time and causes discoloration.
- Always use a microfiber cloth: Rough fabrics create micro-scratches that dull your tint and reduce visibility.
- Avoid direct sunlight when parking: Prolonged UV exposure accelerates tint fading and adhesive breakdown.
- Know your tint type: Ceramic, carbon, and dyed tints each require slightly different care approaches.
- Act fast on bubbles and peeling: Early intervention prevents small issues from becoming expensive repairs.
📑 Table of Contents
Why Auto Window Tint Care Matters
Many car owners invest in quality window tinting and then forget about it. But your tint is a protective layer that needs attention. Think of it like waxing your car. You don’t just apply it once and never think about it again. Regular care keeps it performing at its best.
When you take care of your auto window tint properly, you get several key benefits. Your tint lasts longer, which saves you money on early replacement. The UV protection stays strong, which protects your skin and your car’s interior. And the appearance stays sharp, which keeps your car looking great.
On the flip side, neglecting your tint leads to problems. Bubbles form. The film starts peeling at the edges. Colors fade and look dull. Adhesive weakens, which can cause the tint to shift or come loose. All of these issues are preventable with a simple care routine.
How Long Should Quality Tint Last?
A well-maintained auto window tint should last anywhere from five to ten years. Some premium ceramic tints can even last longer with excellent care. But the lifespan depends heavily on how you maintain it. A tint that receives proper care will outperform one that is neglected by a wide margin.
Several factors influence tint longevity. The quality of the film matters a lot. The brand of tint you choose plays a role too. But the biggest variable you can control is your maintenance routine. This is where the real difference happens.
Understanding Your Tint Type
Before you start any cleaning or maintenance routine, it helps to know what kind of tint you have. Different tint materials respond differently to cleaning products and techniques. Using the wrong approach can damage certain types more than others.
Dyed Tint
Dyed tint is the most common and affordable option. It uses a layer of dye to absorb heat and reduce glare. Dyed auto window tint looks great when new, but it can fade over time, especially with harsh cleaning products. You need to be gentle with dyed tint to preserve its color and appearance.
Metalized Tint
Metalized tint contains tiny metallic particles that reflect heat. This type of tint is more durable than dyed tint. It also offers better signal resistance. However, metalized tint can be more reflective, which sometimes creates glare for other drivers. Cleaning metalized tint requires the same gentle approach as dyed tint.
Carbon Tint
Carbon tint is a step up in quality. It doesn’t fade like dyed tint because it uses carbon particles instead of dye. Carbon tint offers excellent heat rejection and a matte finish that many car owners love. It’s also more resistant to scratching, which makes it slightly easier to maintain.
Ceramic Tint
Ceramic tint is the premium option. It uses nano-ceramic particles to block heat without interfering with electronic signals. Ceramic auto window tint offers the best UV protection and heat rejection available. It’s also the most durable and easiest to care for. If you have ceramic tint, you’re already ahead of the game.
The First 30 Days: Caring for Fresh Tint
The first month after installation is the most critical period for your auto window tint. During this time, the adhesive bond is still curing. If you’re not careful, you can permanently damage the tint before it even has a chance to set properly.
Why the Curing Period Is So Important
When tint is first installed, the adhesive is wet. It needs time to bond fully to the glass. Rolling your windows down too early is the number one mistake people make. The movement can shift the tint, create wrinkles, or break the bond before it cures completely.
During the curing process, you might notice some cloudiness or small water bubbles. Don’t panic. This is completely normal. The moisture trapped between the film and the glass will evaporate over time. Cloudiness usually clears up within one to three weeks.
What to Avoid During the First Month
Here is a list of things you should not do during the first 30 days after getting your auto window tint:
- Do not roll down your windows. Keep them up at all times to let the adhesive set.
- Do not clean the inside of the windows. Any cleaning pressure can disrupt the bonding process.
- Do not use any stickers or accessories on the tinted windows. These can pull at the adhesive and cause peeling.
- Do not sit on the edges of the seats near the doors. Pressure on the window edges can disturb the curing tint.
- Do not use a car cover that presses against the windows. The fabric can stick to the curing film and cause damage.
What You Should Do Instead
Be patient during this period. Keep your windows rolled up. Park in the shade when possible. Heat from direct sunlight speeds up curing, but excessive heat can also cause problems if the adhesive is not yet fully bonded. A shaded parking spot is ideal during the first two weeks.
After about 30 days, you can start cleaning your windows normally. But even then, you should follow the gentle cleaning guidelines we’ll cover next. The curing process continues for several months, so always treat your fresh tint with care for at least the first three months.
Daily Cleaning Best Practices
Cleaning your tinted windows doesn’t need to be complicated. In fact, a simple routine done regularly will keep your tint looking brand new for years. The key is using the right products and the right technique.
Choose the Right Cleaning Products
Not all window cleaners are safe for auto window tint. Many popular brands contain ammonia, which is one of the biggest enemies of tint film. Ammonia breaks down the adhesive and causes the tint to bubble or peel over time. It can also discolor the film, making it look cloudy or uneven.
Instead, look for ammonia-free window cleaners. Many auto detailers sell tint-safe cleaning sprays specifically designed for tinted windows. You can also make a simple DIY cleaner at home using equal parts water and white vinegar. This natural solution is safe, effective, and very affordable.
Here are some safe cleaning product options for your auto window tint:
- Ammonia-free glass cleaners – widely available at auto parts stores.
- Vinegar and water solution – a natural and budget-friendly alternative.
- Mild dish soap diluted in water – great for removing light dirt and grime.
- Tint-specific cleaning sprays – formulated specifically for tinted windows.
Use the Right Cloths
The cloth you use matters just as much as the cleaner you choose. Never use paper towels, rough rags, or abrasive fabrics on your tinted windows. These materials create tiny scratches that build up over time and dull the appearance of your tint.
Always use a soft microfiber cloth for cleaning. Microfiber is gentle on the film surface and picks up dirt without scratching. Use one cloth for applying your cleaner and a second dry cloth for wiping it away. This two-cloth method prevents dirt from being pushed across the surface and causing scratches.
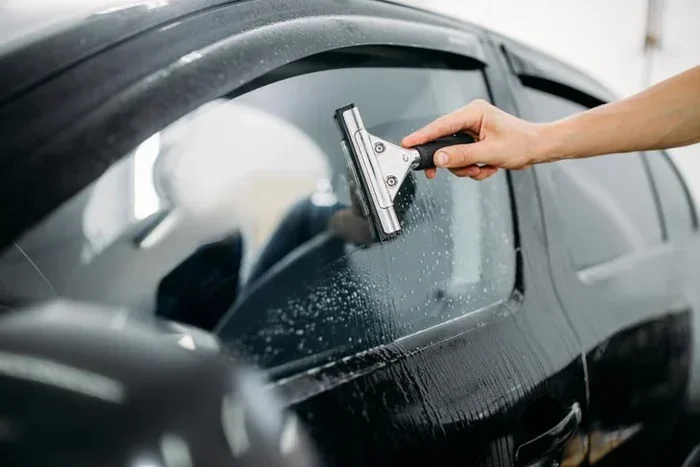
Step-by-Step Cleaning Process
Follow this simple process every time you clean your tinted windows:
- Spray your cleaner onto the microfiber cloth, not directly onto the window. This prevents excess liquid from seeping into the edges of the tint.
- Wipe gently in a circular motion. Apply very light pressure. Let the cleaner do the work.
- Use the dry cloth to buff the surface and remove any remaining moisture or streaks.
- Clean the edges carefully. The edges are the most vulnerable part of your tint. Be extra gentle around the borders.
Clean your tinted windows at least once a week. Regular cleaning prevents dirt and grime from building up and bonding to the film. It also gives you a chance to inspect the tint for any early signs of damage, like small bubbles or peeling edges.
Protecting Your Tint from Damage
Cleaning is only one part of tint maintenance. You also need to protect your auto window tint from external damage. Several everyday situations can harm your tint if you’re not careful.
Watch Out for Sharp Objects
Your tinted windows can be scratched by sharp objects. This includes keys, fingernails, pet claws, and even seatbelts that get pulled across the glass. Be mindful of what touches your tinted windows. If you have pets, consider using a seat cover to prevent their nails from reaching the glass.
Be Careful with Seatbelts
This is one of the most overlooked tint damage causes. When you buckle your seatbelt, the metal buckle can scratch the tint on the door window. Always make sure the buckle lands on the glass surface gently. Don’t let it snap against the tinted area. Over time, repeated impact from seatbelt buckles creates fine scratches that dull the tint.
Protect Against UV Damage
While your tint already blocks a significant amount of UV radiation, prolonged direct sunlight can still affect the adhesive over many years. Parking in shaded areas or using a sunshade helps reduce UV exposure on your windows. This simple habit extends the life of your tint noticeably.
Handle Temperature Changes Gradually
Extreme temperature changes can stress the tint adhesive. For example, blasting your car’s heater directly onto a cold window on a winter morning can cause the film to contract rapidly. This stress can lead to bubbling or peeling at the edges. Try to warm your car gradually and avoid directing heat vents directly at the tinted windows.
Quick Tips for Tint Protection
- Use a dashboard sunshade when parking in direct sunlight.
- Avoid hanging air fresheners or accessories that press against tinted windows.
- Be gentle when cleaning around the tint edges.
- Inspect your tint monthly for early signs of damage.
- Address small bubbles immediately before they grow larger.
Common Mistakes That Damage Auto Window Tint
Knowing what not to do is just as important as knowing what to do. Many car owners accidentally damage their tint through habits they don’t even realize are harmful. Here are the most common mistakes you should avoid.
Using Ammonia-Based Cleaners
This is the single biggest mistake people make with their tinted windows. Ammonia-based cleaners like regular Windex are everywhere, and they’re convenient. But they slowly eat away at the tint film. The damage is gradual, so you might not notice it at first. By the time you see bubbling or discoloration, the damage is already done.
Rolling Windows Down Too Early
We mentioned this in the curing section, but it deserves repeating. Rolling your windows down before the adhesive fully cures is the fastest way to ruin fresh tint. Even after the curing period, be gentle with window operation. Sudden, forceful window movements can stress the film edges.
Using Rough Materials for Cleaning
Old t-shirts, paper towels, and rough sponges might seem harmless, but they scratch the tint surface over time. Always stick with soft microfiber cloths. Your tint will thank you for it.
Ignoring Small Bubbles
A tiny bubble might seem harmless, but it can grow and become a bigger problem. Small bubbles are often trapped moisture that works its way between the film and the glass. If left alone, they can spread and affect your visibility. Address small bubbles early by gently pressing them with a soft cloth.
Skipping Regular Cleaning
Dirt and grime don’t just look bad on tinted windows. They can actually eat into the film over time. Dust particles act like tiny abrasive particles that scratch the surface every time you touch the window. Regular cleaning prevents this buildup and keeps your tint in great condition.
When to Replace or Remove Your Tint
Even with the best care, your auto window tint won’t last forever. Knowing when it’s time to replace or remove your tint saves you from dealing with a deteriorating film that looks bad and performs poorly.
Signs Your Tint Needs Attention
Watch for these warning signs that your tint may need professional attention:
- Bubbling that doesn’t go away – small bubbles that appear and persist are a sign of adhesive failure.
- Peeling at the edges – when the tint starts lifting at the corners, it won’t get better on its own.
- Discoloration or fading – a purple or brownish tint usually means the dye has broken down.
- Increased heat inside the car – if your tint is no longer blocking heat effectively, it may be worn out.
- Blurry or cloudy patches – persistent cloudiness even after the curing period indicates deeper damage.
Can You Replace Tint Yourself?
While DIY tint kits are available, professional replacement is always recommended. A trained installer has the tools, experience, and environment to apply new tint correctly. Poorly installed tint leads to the same problems you were trying to fix in the first place. Investing in professional replacement pays off in the long run.
Check Your Warranty
Before you replace your tint, check if your original installation comes with a warranty. Many reputable tint installers offer warranties that cover bubbling, peeling, and discoloration. A good warranty can save you hundreds of dollars on replacement costs. Keep your installation receipt and warranty documentation in a safe place.
Key Takeaways
- Wait 30 days before rolling down your windows: This lets the adhesive cure properly and prevents peeling or bubbling.
- Use ammonia-free cleaners only: Ammonia breaks down the tint film over time and causes discoloration.
- Always use a microfiber cloth: Rough fabrics create micro-scratches that dull your tint and reduce visibility.
- Avoid direct sunlight when parking: Prolonged UV exposure accelerates tint fading and adhesive breakdown.
- Know your tint type: Ceramic, carbon, and dyed tints each require slightly different care approaches.
- Act fast on bubbles and peeling: Early intervention prevents small issues from becoming expensive repairs.
Conclusion
Caring for your auto window tint is easier than most people think. A little bit of attention and a few simple habits go a long way. From the first 30 days after installation to your daily cleaning routine, every step matters. The right products, the right technique, and a little patience keep your tint looking great and performing well for years.
Remember to always use ammonia-free cleaners, soft microfiber cloths, and gentle pressure when cleaning. Protect your tint from sharp objects, extreme temperatures, and prolonged UV exposure. And when problems arise, address them quickly before they get worse.
Your auto window tint is an investment. It protects you from UV rays, keeps your car cooler, adds privacy, and enhances the look of your vehicle. Treat it well, and it will reward you with lasting performance and great appearance. Start following these tips today, and your tint will stay in excellent condition for many years to come.
Take a few minutes right now to inspect your tinted windows. Look for any early signs of wear or damage. Make the switch to ammonia-free cleaners if you haven’t already. These small changes make a big difference over time. Your future self will thank you when your tint still looks amazing years down the road.
Frequently Asked Questions
How long should I wait before cleaning my newly installed auto window tint?
Wait at least 30 days before cleaning the inside of your tinted windows. During this time, the adhesive is still curing and any cleaning pressure can disrupt the bond. After the first month, you can clean gently using ammonia-free products and a soft microfiber cloth.
Can I use regular Windex on my tinted windows?
No, you should never use regular Windex or any ammonia-based cleaner on auto window tint. Ammonia breaks down the tint film over time, causing bubbling, peeling, and discoloration. Stick with ammonia-free cleaners or a simple vinegar and water solution instead.
How do I get rid of small bubbles in my tint?
Small bubbles often disappear on their own as the adhesive cures. If a bubble persists after the curing period, you can gently press it with a soft microfiber cloth. For larger or stubborn bubbles, contact a professional tint installer who can safely remove and reapply the affected section.
Does tint care differ based on the type of tint installed?
Yes, different tint types require slightly different care. Ceramic tint is the most durable and easiest to maintain. Carbon tint is also quite resilient. Dyed tint is more prone to fading and needs the gentlest handling. Always check with your installer for specific care instructions for your tint type.
Can I use a window tint kit to fix peeling edges myself?
DIY tint repair kits are available and can work for very minor edge peeling. However, professional repair is always recommended for the best results. Improper DIY fixes can make the damage worse and lead to more expensive repairs down the road.
How can I make my auto window tint last longer?
The best way to extend the life of your tint is to clean it regularly with ammonia-free products, use microfiber cloths, avoid sharp objects, park in shaded areas when possible, and address any damage immediately. Consistent care and attention are the keys to long-lasting tint performance.