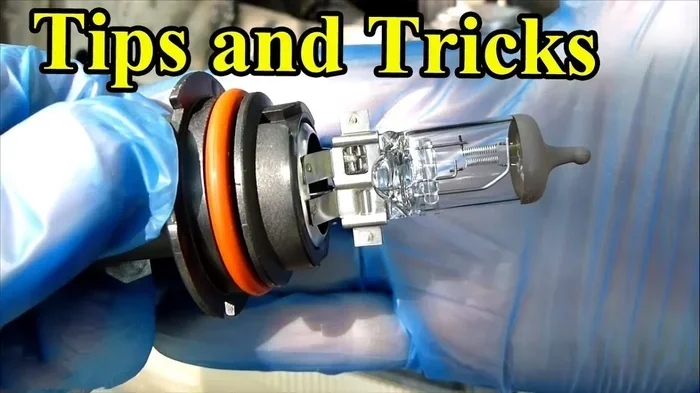
What Should You Never Do When Changing Headlight Bulbs
Changing headlight bulbs seems simple, but small mistakes can lead to big problems like cracked housings, blown fuses, or poor visibility at night. This article reveals the top errors you should never make when changing headlight bulbs, from touching the glass with bare hands to ignoring bulb compatibility. Learn the dos and don’ts so your headlights work perfectly and keep you safe on the road.
Changing a headlight bulb is one of those car maintenance tasks that looks easy on paper. You pop the hood, twist a few things, and swap out the old bulb, right? Not so fast. There are plenty of things that can go wrong, and most of them happen because people skip simple steps or make careless choices.
When you are changing headlight bulbs, the mistakes you make can affect more than just the bulb itself. A wrong move can crack the headlight housing, fry the wiring harness, or even blow a headlight fuse. Worse, a poorly installed bulb can blind other drivers and put you at serious risk on dark roads.
In this guide, we walk you through exactly what you should never do when changing headlight bulbs. We cover everything from bulb handling errors to electrical mistakes and post-installation oversights. By the end, you will know how to do the job right the first time and keep your headlights shining bright for miles to come.
Key Takeaways
- Never touch the bulb glass with bare fingers: Skin oils create hot spots that shorten bulb life dramatically.
- Always match the bulb type to your vehicle: Using the wrong wattage or bulb model can damage the headlight assembly.
- Disconnect the battery first: Working on electrical components without disconnecting power risks shorts and shocks.
- Don’t skip the protective gloves: Even with a cloth, bare hands leave residues that cause uneven heating and premature failure.
- Check the headlight alignment after replacement: A misaligned bulb blinds oncoming drivers and reduces your own visibility.
- Never force the bulb into the socket: Forced installation can break the glass, damage the connector, or bend the bulb holder.
- Replace bulbs in pairs: Changing only one headlight creates uneven lighting and can strain the headlight relay and wiring harness.
📑 Table of Contents
- Why Mistakes When Changing Headlight Bulbs Matter
- Never Touch the Bulb Glass with Bare Hands
- Never Use the Wrong Bulb Type or Wattage
- Never Skip Disconnecting the Battery
- Never Force the Bulb Into the Socket
- Never Forget to Check Bulb Alignment After Installation
- Never Replace Only One Headlight Bulb
- Never Ignore Warning Signs After a Bulb Change
- Key Takeaways
- Conclusion
Why Mistakes When Changing Headlight Bulbs Matter
Some people treat headlight bulb replacement as a quick, no-big-deal chore. But headlights are critical for nighttime driving, foggy conditions, and bad weather. When you get it wrong, the consequences go beyond a dim beam. A damaged headlight assembly can cost hundreds of dollars to fix. A misaimed bulb can cause accidents. And using the wrong bulb type can overload your vehicle’s electrical system.
Your headlight system includes more than just the bulb. There is the bulb socket, the headlight connector, the wiring harness, and sometimes a relay or fuse that controls power flow. Every part of this system works together. If one piece gets damaged during a bulb swap, the whole headlight assembly can fail. That is why knowing what not to do matters just as much as knowing the right steps.
The Cost of Getting It Wrong
A single halogen bulb might cost between 10 and 30 dollars. But if you crack the headlight housing while forcing a bulb in, you could be looking at a 100 to 300 dollar replacement. If you short out the wiring, you might need a relay or fuse replacement too. And if your headlights end up misaligned, a professional realignment session can add another 50 to 100 dollars to the bill. All of this is completely avoidable with a little care.
Never Touch the Bulb Glass with Bare Hands
This is the number one mistake people make when changing headlight bulbs, and it is also the easiest to avoid. When you hold a bulb with your bare fingers, the natural oils and salts on your skin transfer onto the glass surface. These oils might be invisible, but they cause serious problems once the bulb heats up.
When the bulb turns on, the oil residue creates uneven hot spots on the glass. These hot spots cause the bulb to expand unevenly, which leads to cracking or, in the worst case, an immediate explosion inside the headlight housing. A shattered bulb can damage the reflector and the lens of the headlight assembly, making the entire unit useless.
How to Handle Bulbs the Right Way
Always wear clean, lint-free gloves when handling any headlight bulb, whether it is a halogen bulb, an LED headlight, or an HID bulb. If you do not have gloves, use a clean cloth or a paper towel. Never touch the glass part of the bulb at all. Hold it only by the plastic or ceramic base.
Here is a quick tip that many experienced car owners follow: keep a pair of nitrile gloves in your glove box at all times. That way, you are always ready for a bulb change without having to dig through your toolbox.
What If You Already Touched the Glass?
If you accidentally touched the bulb glass, do not panic. You can still fix the situation. Use a clean cloth dampened with rubbing alcohol and gently wipe the glass surface. Let it dry completely before installing the bulb. This removes the oils and reduces the risk of hot spots. However, it is always better to prevent the problem in the first place by wearing gloves from the start.
Never Use the Wrong Bulb Type or Wattage
Not all headlight bulbs are the same. Your vehicle was designed to work with a specific bulb type, whether that is a halogen bulb, an LED headlight, or a high-intensity discharge (HID) bulb. Using the wrong bulb can lead to poor performance, overheating, and even electrical damage.
For example, putting a 100-watt bulb where the factory spec calls for a 55-watt bulb will send too much current through the headlight connector and the wiring harness. Over time, this can melt insulation, damage the bulb holder, and even cause a fire hazard inside the headlight housing.
Halogen vs. LED vs. HID
Each bulb type has different characteristics. Halogen bulbs are the most common and affordable. They produce a warm, yellowish light and work well in standard headlight assemblies designed for them. LED headlights are energy-efficient and last longer, but they require compatible headlight housings to function properly. HID bulbs produce a bright, bluish-white light but need a ballast and a specific socket type.
Swapping a halogen bulb for an LED bulb without checking compatibility is a common mistake. The LED bulb might not fit the socket correctly, or it might not connect properly with the headlight relay. In some vehicles, an LED bulb can trigger a warning message on the dashboard because the system detects lower current draw.
How to Find the Right Bulb for Your Vehicle
Check your owner manual first. It will list the exact bulb type and wattage for both the low beam and high beam. You can also look at the old bulb before you remove it. The base of the bulb will have markings that tell you the model number and specifications. Match these exactly when buying a replacement.
If you want to upgrade from halogen to LED or HID, do your research first. Make sure the new bulb fits your headlight housing and that your vehicle’s electrical system can handle it. Some upgrades require additional wiring or a decoder to work correctly.
Never Skip Disconnecting the Battery
This might seem like an unnecessary step, especially if you are just swapping a bulb. But disconnecting the battery is one of the most important safety precautions you can take. Working on any electrical component without cutting the power creates a real risk of short circuits, electrical shock, and damage to your vehicle’s electronics.
When the battery is connected, there is live current flowing through the headlight connector and the wiring harness. If you accidentally touch the wrong wire while the bulb is out, you can create a short that blows a fuse or damages the headlight relay. In modern vehicles with complex electrical systems, a short can even affect other components like the dashboard computer or the infotainment system.
How to Safely Disconnect Your Battery
Start by turning off the engine and removing the key from the ignition. Locate the negative terminal on the battery, usually marked with a minus sign. Use a wrench to loosen the clamp and remove the cable. Tuck the cable away from the battery terminal so it cannot accidentally reconnect.
Wait at least five minutes before starting work. This allows any residual charge in the system to dissipate. Once you have done this, you can safely work on the headlight bulb without worrying about electrical hazards.
Do You Always Need to Disconnect the Battery?
For a simple bulb swap in an older vehicle, some people skip this step and get away with it. But it is never worth the risk. A moment of carelessness can lead to a costly repair. The few minutes it takes to disconnect the battery can save you hours of troubleshooting electrical problems later. Make it a habit every single time you work on any electrical component in your car.
Never Force the Bulb Into the Socket
A headlight bulb should slide into its socket with gentle, smooth pressure. If you feel resistance or have to push hard, something is wrong. Forcing the bulb can crack the glass, bend the metal contacts, or damage the bulb holder inside the headlight assembly.
One common reason bulbs get stuck is a misaligned connector. The headlight connector might not be seated properly, or the locking tab might be in the wrong position. Before pushing the bulb in, make sure the connector is aligned correctly and that you have removed any protective caps or covers.
Check the Bulb Holder and Connector
Take a close look at the bulb holder before you insert the new bulb. Look for any signs of corrosion, melting, or bending on the metal contacts. If the holder looks damaged, replacing it is a smart move. A corroded or bent holder can cause poor electrical contact, which leads to flickering headlights or a bulb that keeps burning out.
Also inspect the headlight connector for bent pins. A connector with damaged pins will not make a solid connection, and your new bulb might not work even after a perfect installation.
When the Bulb Feels Stuck
If the bulb does not slide in easily, stop and reassess. Check that you have the correct bulb type. Verify that the connector is fully seated. Make sure the bulb is oriented correctly. Sometimes the rubber gasket around the socket can create extra resistance, and you need to wiggle the bulb gently to find the right position.
Never use tools like pliers or a screwdriver to push a bulb into place. This can easily crack the glass or damage the socket. Patience and a gentle touch go a long way when changing headlight bulbs.
Never Forget to Check Bulb Alignment After Installation
Installing a new bulb is only half the job. Once the bulb is in and the headlight is powered on, you need to check the alignment. A bulb that is even slightly off-center can shine light in the wrong direction. This can blind oncoming drivers and reduce your own visibility on dark roads.
Headlight alignment matters for both safety and legal reasons. In many places, driving with misaligned headlights is a traffic violation. It can also lead to failed vehicle inspections. A properly aligned headlight sends light down the road at the correct angle, giving you the best view without bothering other drivers.
How to Check Headlight Alignment
The easiest way to check alignment is to park your car about 25 feet from a flat wall or garage door. Turn on the low beams and observe where the light hits the wall. The light should be level and aimed slightly to the right (in left-hand traffic countries) or slightly to the left (in right-hand traffic countries). There should be a clear cutoff line where the light stops.
If the light is too high, too low, or angled to one side, you need to adjust the headlight. Most vehicles have adjustment screws on the back of the headlight housing. Turn these screws carefully until the beam is at the correct height and direction.
When to Get Professional Alignment
If you are not comfortable adjusting the headlights yourself, take your car to a mechanic or auto parts store. Many shops offer free headlight alignment checks. This is a quick and easy way to make sure your new bulb is aimed correctly and doing its job.
Never Replace Only One Headlight Bulb
It is tempting to replace just the bulb that burned out and leave the other one alone. After all, if both headlights still work, why spend extra money? But replacing bulbs in pairs is one of the best practices for maintaining consistent lighting and protecting your electrical system.
When one bulb burns out, the other bulb has likely been in use for the same amount of time. It is probably dimmer than it used to be, even if it still works. Replacing both bulbs at the same time ensures that both headlights produce the same color temperature and brightness. This gives you balanced lighting and a clearer view of the road ahead.
How Pair Replacement Protects Your Electrical System
When both bulbs draw the same amount of current, the headlight relay and the wiring harness operate evenly. If you have one old, dim bulb and one new, bright bulb, the electrical load becomes unbalanced. Over time, this can put extra stress on the headlight connector and the wiring harness, leading to premature wear and potential electrical issues.
Also, if you use an aftermarket bulb for the replacement, make sure it matches the other bulb exactly. Mixing different bulb brands or types can cause uneven light output and color temperature, which can be distracting for both you and other drivers.
What About OEM Bulbs vs. Aftermarket Bulbs?
OEM bulbs are made by the same manufacturer that supplied the original bulb for your vehicle. They are designed to match the exact specifications of your headlight assembly. Aftermarket bulbs come from third-party manufacturers and may vary in quality, brightness, and color temperature.
You do not have to use OEM bulbs, but you should choose a reputable aftermarket brand. Look for bulbs that meet or exceed the original specifications. Check reviews and ratings before buying. A high-quality aftermarket bulb can sometimes outperform the OEM version, especially if you are upgrading to an LED headlight or an HID bulb.
Never Ignore Warning Signs After a Bulb Change
Once you have finished changing your headlight bulb, pay attention to how the headlights perform. If something feels off, do not ignore it. Warning signs after a bulb change can indicate a problem that needs immediate attention.
Common warning signs include flickering headlights, one headlight brighter than the other, a headlight that does not turn on at all, or a warning light on the dashboard. Each of these signs points to a different issue, and catching them early can prevent bigger problems down the road.
Flickering Headlights
Flickering usually means there is a poor electrical connection. Check that the bulb is seated properly in the socket. Inspect the headlight connector for corrosion or bent pins. A loose connector or a worn-out wiring harness can also cause flickering. If the problem persists, it might be a headlight relay that needs replacement.
One Headlight Brighter Than the Other
This is almost always an alignment issue. The brighter bulb is likely aimed lower or straighter than the dimmer one. Adjust the alignment screws on the back of the headlight housing until both beams match. If adjusting the alignment does not fix the problem, check the bulb wattage and type to make sure both bulbs are identical.
Dashboard Warning Lights
Modern vehicles have sensors that monitor the headlight system. If a bulb is not drawing the expected current, the car may display a warning message. This is common when upgrading to LED or HID bulbs in vehicles designed for halogen bulbs. In these cases, you may need a decoder or a CANbus adapter to trick the system into recognizing the new bulb as a working headlight.
Key Takeaways
- Never touch the bulb glass with bare fingers: Skin oils create hot spots that shorten bulb life dramatically.
- Always match the bulb type to your vehicle: Using the wrong wattage or bulb model can damage the headlight assembly.
- Disconnect the battery first: Working on electrical components without disconnecting power risks shorts and shocks.
- Don’t skip the protective gloves: Even with a cloth, bare hands leave residues that cause uneven heating and premature failure.
- Check the headlight alignment after replacement: A misaligned bulb blinds oncoming drivers and reduces your own visibility.
- Never force the bulb into the socket: Forced installation can break the glass, damage the connector, or bend the bulb holder.
- Replace bulbs in pairs: Changing only one headlight creates uneven lighting and can strain the headlight relay and wiring harness.
Conclusion
Changing headlight bulbs does not have to be a stressful or complicated task. When you know what to avoid, the process becomes much simpler and safer. The biggest takeaway from this guide is that small mistakes during bulb replacement can lead to expensive repairs, poor visibility, and even dangerous driving conditions.
Always wear gloves, use the correct bulb type, disconnect the battery, and handle the bulb and socket with care. Check the alignment after installation and replace bulbs in pairs whenever possible. These simple habits will keep your headlights working at their best and protect you on every drive.
Whether you drive a vehicle with halogen bulbs, LED headlights, or an older model with a simple headlight assembly, these rules apply to everyone. The next time you need to change a headlight bulb, take your time, follow the right steps, and never rush the process. Your headlights are your first line of defense on dark roads, and they deserve the same care and attention as the rest of your vehicle.
Keep this guide handy for your next headlight bulb replacement. Share it with a friend who might benefit from it. And remember, the best way to avoid mistakes when changing headlight bulbs is to know exactly what not to do before you start.
Frequently Asked Questions
Can I use a higher-wattage bulb for brighter headlights?
No, you should always stick to the wattage recommended by your vehicle manufacturer. A higher-wattage bulb puts extra strain on the wiring harness, the headlight connector, and the headlight relay. This can cause overheating, melted wires, and even electrical fires. Check your owner manual for the correct bulb specifications before making any changes.
How do I know if my headlight bulb is an LED, halogen, or HID type?
Check the markings on the base of the old bulb before you remove it. The model number and bulb type will be printed there. You can also check your owner manual or look up your vehicle year, make, and model online. Each bulb type requires a different socket and may need specific headlight housings to work correctly.
Why do my new headlight bulbs keep burning out quickly?
Frequent bulb burnout is often caused by touching the glass with bare hands, using the wrong bulb type, or having a loose headlight connector. Skin oils on the bulb glass create hot spots that weaken the filament. A bad connection can cause voltage spikes that burn out the bulb faster. Always wear gloves and make sure the bulb is seated securely in the socket.
Do I need to realign my headlights after changing the bulb?
Yes, it is a good practice to check headlight alignment after every bulb replacement. Even a slight shift during installation can change the beam direction. Park your car about 25 feet from a wall, turn on the headlights, and check the beam pattern. Adjust the alignment screws on the back of the housing if the light is not level or aimed correctly.
What is the difference between OEM and aftermarket headlight bulbs?
OEM bulbs are made by the original manufacturer and match the exact specifications of your vehicle. Aftermarket bulbs are made by third-party companies and may offer different features like brighter light or longer lifespan. Aftermarket bulbs can be a great option, but always check compatibility and quality ratings before buying. A high-quality aftermarket bulb can match or even exceed OEM performance.
Can I change a headlight bulb without disconnecting the battery?
Technically, you can, but it is not recommended. Working on live electrical connections increases the risk of short circuits, blown fuses, and electrical shocks. Disconnecting the battery takes only a few minutes and adds a significant layer of safety. Make it a standard practice every time you work on any electrical component in your vehicle.
=== CONCLUSION ===
Knowing what you should never do when changing headlight bulbs is just as important as knowing the right steps. From avoiding bare-hand contact with the bulb glass to matching the correct bulb type and wattage, every detail matters. Your headlights keep you visible and safe during nighttime driving, fog, rain, and everything in between.
Take the time to do the job right. Wear gloves, disconnect the battery, handle the bulb carefully, and check your alignment afterward. Replace bulbs in pairs for balanced lighting. And never ignore warning signs after installation. These habits will protect your vehicle, your wallet, and everyone on the road around you.
Changing headlight bulbs is a simple maintenance task that anyone can do with the right knowledge and a little patience. Keep this guide bookmarked for your next bulb replacement, and you will never have to worry about making costly mistakes again.