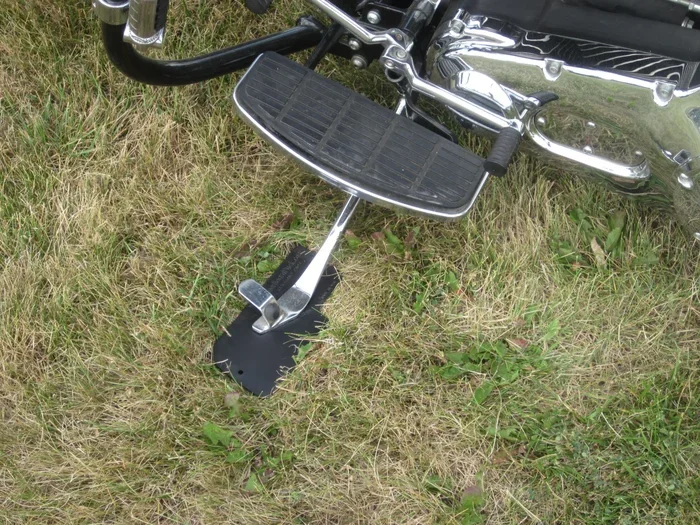
Harley-Davidson Kickstand Problems and How to Fix Them
Harley-Davidson kickstand problems can leave you stranded or cause engine shutdowns while riding. Whether it is a faulty kickstand switch, a weak spring, or a broken solenoid, these issues are fixable with the right guidance. This article covers the most common Harley kickstand issues and provides clear, actionable steps to solve them yourself. You will learn how to diagnose, repair, and prevent kickstand failures on your motorcycle.
There is nothing worse than rolling up to a stoplight and hearing your Harley sputter and die. More often than not, the culprit is a simple Harley-Davidson kickstand problem. These issues are incredibly common across Harley models, from the classic Sportster to the modern Road Glide. The good news? Most of them are easy to fix.
Your motorcycle kickstand is a small but critical component. It keeps your bike upright when parked and signals the engine to shut off when the stand is down. When something goes wrong with this system, it can cause stalling, electrical faults, or even safety hazards while riding. In this guide, we will walk you through every common Harley-Davidson kickstand problem and show you exactly how to fix it.
Key Takeaways
- Faulty kickstand switch is the #1 cause: A worn or dirty switch often triggers engine shutdown when the side stand is down.
- Weak or broken kicksprings are common: Over time, springs lose tension and fail to hold the kickstand up properly.
- You can fix most problems at home: Basic tools and a little know-how can save you a trip to the shop.
- Regular maintenance prevents issues: Cleaning and lubricating the kickstand mechanism extends its life significantly.
- Know when to seek professional help: Electrical problems like a bad solenoid or wiring issue may need a mechanic.
- Older Harleys are more prone to kickstand failures: Classic models often need upgraded parts for reliability.
📑 Table of Contents
- Understanding Your Harley-Davidson Kickstand System
- Common Harley-Davidson Kickstand Problems and Their Symptoms
- How to Diagnose Kickstand Problems on Your Harley
- How to Fix Harley-Davidson Kickstand Problems
- Preventing Kickstand Problems Before They Start
- When to Seek Professional Help for Kickstand Issues
- Comparing OEM vs Aftermarket Kickstand Parts
- Quick Tips for Harley Kickstand Care
- Common Mistakes Riders Make With Their Kickstand
- Expert Insights on Harley-Davidson Kickstand Reliability
- Key Takeaways
- Conclusion
Understanding Your Harley-Davidson Kickstand System
Before diving into fixes, it helps to understand how your kickstand system works. The system is made up of several parts that work together. When any one of them fails, the whole system suffers.
How the Kickstand Mechanism Works
When you put your Harley on the side stand, a small switch gets pressed down. This switch tells the bike that it is on the ground. The engine then shuts off or prevents starting. This is a safety feature designed to stop the bike from lurching forward while parked. A small spring pushes the kickstand back up when you retract it. The entire process is simple but relies on each part working correctly.
Key Components of the Kickstand System
- Side stand lever: The metal arm that touches the ground.
- Kickstand spring: Provides the tension to hold the stand up or snap it back.
- Kickstand switch: The electrical sensor that detects when the stand is down.
- Side stand solenoid: Controls the electrical connection to the engine kill circuit.
- Brackets and pivot points: Hold everything in place and allow smooth movement.
Now that you know the basics, let us look at the most common problems riders face with their Harley-Davidson kickstand setups.
Common Harley-Davidson Kickstand Problems and Their Symptoms
Every Harley owner will likely deal with a kickstand issue at some point. Recognizing the symptoms early can save you from bigger headaches down the road.
Engine Stalling When the Kickstand Is Up
This is one of the most frustrating problems. You are riding along, the kickstand is fully up, and suddenly the engine dies. Usually, this means the kickstand switch is stuck in the “down” position. Dirt, corrosion, or a bent lever can cause this. The bike thinks it is still on the stand, so it cuts the engine. This is a very common Harley-Davidson electrical problem that many riders overlook.
Engine Won’t Start With Kickstand Down
On the flip side, sometimes your bike refuses to start when the kickstand is down. This points to a bad kickstand switch or a faulty side stand relay. The safety circuit is not completing properly, so the bike stays dead. It feels like a mystery until you trace it back to the switch or relay.
Kickstand Won’t Stay Up
A weak or broken kickspring is usually the cause here. The stand droops down even when you think it is folded up. This not only looks bad but can also damage the stand mechanism over time. On older Harleys, the spring weakens with age and regular use. It is one of the most frequent motorcycle maintenance issues for classic bike owners.
Loose or Wobbly Kickstand
If your side stand feels shaky or moves side to side, the pivot bolt may be worn. The bracket that holds the stand to the frame can also bend or crack. A loose kickstand is a safety risk. It can fold while you are parked on a slope, causing your bike to fall over.
Clicking Sound When Putting Down the Stand
A clicking or ticking noise often means the solenoid is not engaging correctly. The solenoid is the electromagnetic part that connects the switch to the engine circuit. When it fails, you may hear clicking but feel no mechanical response. This is a telltale sign of a side stand relay problem.
How to Diagnose Kickstand Problems on Your Harley
Before you grab any tools, a proper diagnosis saves time and money. You do not want to replace parts that are still working fine.
Step-by-Step Diagnostic Process
- Visual inspection: Look at the kickstand lever, spring, and bracket. Check for visible damage, rust, or bending.
- Check the switch: Locate the kickstand switch near the pivot point. See if the lever moves freely when you flip the stand up and down.
- Test the electrical connection: Use a multimeter to check for continuity in the switch. No continuity when the stand is down means a bad switch.
- Inspect the spring: Press down on the kickstand and let it go. It should snap back up with force. If it slowly drifts down, the spring is weak.
- Listen for solenoid clicks: Have someone flip the stand while you listen near the relay area. A healthy solenoid makes a solid click, not a tick.
These simple steps will help you pinpoint the exact issue. Many riders skip the diagnosis and just start replacing parts, which wastes money. Take a few minutes first, and you will save both time and cash.
How to Fix Harley-Davidson Kickstand Problems
Now for the part you have been waiting for. Here are detailed fixes for each of the common problems we covered above.
Fix 1: Cleaning or Replacing the Kickstand Switch
A dirty or corroded kickstand switch is the number one cause of engine stalling and starting issues. Start by locating the switch near the kickstand pivot. Unplug the electrical connector and inspect the contacts. If they look green, corroded, or dirty, clean them with electrical contact cleaner. A small wire brush works wonders here.
If cleaning does not solve the problem, replace the switch. Harley-Davidson OEM switches are affordable and widely available. You can also find aftermarket options that are just as good. The entire swap takes about 15 minutes with basic tools. This is one of the easiest Harley repair jobs you can do at home.
Fix 2: Replacing a Weak Kickstand Spring
A worn-out spring will not hold the kickstand up properly. To replace it, first fold the kickstand down and remove the pivot bolt. Take out the old spring and note how it was seated. Install the new spring in the same position and reassemble. Make sure the spring has enough tension to snap the stand up firmly.
Pro tip: Always keep a spare kickspring in your tool kit. These small parts are cheap and they save you from being stranded. It is one of the best motorcycle maintenance habits you can build.
Fix 3: Tightening or Replacing the Side Stand Bracket
A wobbly kickstand often comes from a loose or damaged bracket. Check the bolts that hold the bracket to the frame. Tighten them with the correct torque specs. If the bracket is bent or cracked, you need a replacement. Harley-Davidson dealerships carry OEM brackets, and online parts stores offer compatible alternatives too.
When tightening the bracket, make sure the kickstand pivot still moves freely. Over-tightening can restrict the swing and cause the stand to stick. Balance is key here.
Fix 4: Replacing a Faulty Side Stand Solenoid
If you hear clicking but the stand does not engage properly, the solenoid may be bad. First, check the wiring connected to the solenoid for fraying or corrosion. Clean the connections and try again. If the problem persists, replace the solenoid. This part is not expensive, and the replacement process is straightforward for most Harley models.
Always disconnect the battery before working on any electrical component. Safety first, always.
Preventing Kickstand Problems Before They Start
Prevention is always better than repair. A little regular care goes a long way toward keeping your Harley-Davidson kickstand in top shape.
Regular Maintenance Tips
- Clean the kickstand area monthly: Use a damp cloth to remove dirt and road grime. Buildup around the pivot causes sticking and corrosion.
- Lubricate the pivot point: Apply a light machine oil or silicone spray to the kickstand pivot every few months. This keeps movement smooth and prevents rust.
- Check the spring tension regularly: A quick flip of the stand every week lets you feel if the spring is getting weak.
- Inspect electrical connections: Look at the kickstand switch wiring for fraying or loose plugs. Fix small issues before they become big problems.
- Store your bike properly: If you park on a slope, try to keep the bike on level ground. This reduces stress on the kickstand mechanism.
Seasonal Check-Up Routine
At the start of every riding season, give your kickstand system a full check. Inspect the spring, clean the switch, and test the electrical circuit. This seasonal routine catches small problems before they ruin your day on the road. Many experienced riders make this part of their Harley-Davidson troubleshooting checklist before every first ride of the year.
When to Seek Professional Help for Kickstand Issues
Most kickstand fixes are DIY-friendly. But some problems need a professional hand. If you have checked the switch, spring, and solenoid and the problem still persists, there may be a deeper electrical issue. Wiring problems hidden in the frame or a faulty engine control module can mimic kickstand symptoms.
Also, if the kickstand bracket is cracked or the frame has sustained damage, do not attempt to ride the bike. Take it to a certified Harley mechanic. They have the diagnostic tools and expertise to find hidden problems. A good rule of thumb is: if you are unsure, get a second opinion. It is always better to be safe than sorry.
Comparing OEM vs Aftermarket Kickstand Parts
When it is time to replace a kickstand part, you have two main choices: OEM (Original Equipment Manufacturer) or aftermarket parts.
| Feature | OEM Parts | Aftermarket Parts |
|---|---|---|
| Fit and finish | Perfect match to factory specs | Varies by manufacturer |
| Price | Higher cost | Generally more affordable |
| Durability | High quality, tested by Harley | Good quality from reputable brands |
| Availability | Available through dealerships | Widely available online |
| Warranty | Covered under Harley warranty | Varies by seller |
For most riders, aftermarket parts from trusted brands work just as well as OEM. The key is to buy from a reputable seller. Cheap no-name parts may save money upfront but can fail quickly. Read reviews and check return policies before you buy.
Quick Tips for Harley Kickstand Care
- Tip 1: Always put the bike on the kickstand on a flat surface. This prevents unnecessary stress on the mechanism.
- Tip 2: Use dielectric grease on electrical connections to prevent corrosion.
- Tip 3: Keep a small flashlight in your saddlebag for nighttime kickstand checks.
- Tip 4: If you ride in wet or salty conditions, clean the kickstand area more frequently to prevent rust.
- Tip 5: Replace the kickstand switch every few years as preventive maintenance, even if it seems fine.
Common Mistakes Riders Make With Their Kickstand
Even experienced riders make mistakes that lead to kickstand problems. Here are a few to avoid.
- Forgetting to fully retract the stand: A partially folded kickstand can damage the switch and the spring mechanism over time.
- Ignoring small clicking sounds: A light click may seem harmless, but it often signals a failing solenoid that will get worse.
- Using the kickstand as a step: Stepping on the kickstand puts uneven force on the bracket and can bend it.
- Skipping regular inspections: A quick visual check before every ride takes seconds and catches problems early.
- Over-tightening bolts: This can strip threads or crack the bracket, creating bigger problems than the original issue.
Expert Insights on Harley-Davidson Kickstand Reliability
seasoned Harley mechanics agree that the kickstand system is one of the most neglected parts of the motorcycle. Riders focus on the engine, the brakes, and the tires, but they forget about the humble kickstand until something goes wrong. Regular attention to this system prevents unexpected breakdowns and keeps you safe on the road.
One expert mechanic shared that the most common cause of repeat kickstand issues is moisture getting into the electrical connections. A simple application of dielectric grease on the switch connector can prevent this problem for years. Another mechanic pointed out that Harley riders who store their bikes outdoors in humid climates should check the kickstand switch more frequently than those who keep their bikes in a garage.
These small habits make a huge difference over the life of your motorcycle. The kickstand may seem like a minor component, but it plays a major role in the safety and reliability of your ride.
Key Takeaways
- Faulty kickstand switch is the #1 cause: A worn or dirty switch often triggers engine shutdown when the side stand is down.
- Weak or broken kickstand springs are common: Over time, springs lose tension and fail to hold the kickstand up properly.
- You can fix most problems at home: Basic tools and a little know-how can save you a trip to the shop.
- Regular maintenance prevents issues: Cleaning and lubricating the kickstand mechanism extends its life significantly.
- Know when to seek professional help: Electrical problems like a bad solenoid or wiring issue may need a mechanic.
- Older Harleys are more prone to kickstand failures: Classic models often need upgraded parts for reliability.
Conclusion
Harley-Davidson kickstand problems are common but rarely serious. Most issues stem from a dirty switch, a weak spring, or a worn-out solenoid. With the right knowledge and a few basic tools, you can diagnose and fix the vast majority of these problems yourself. Regular maintenance and seasonal check-ups keep your kickstand system working reliably for years to come.
Do not let a small kickstand issue ruin your ride. Take the time to inspect your system, fix problems early, and enjoy the confidence that comes with knowing your Harley is in great shape. Whether you are a seasoned rider or a newer Harley owner, understanding your kickstand system is an essential part of motorcycle ownership. Keep this guide handy, and you will be prepared for whatever comes your way on the road ahead.
Frequently Asked Questions
Why does my Harley engine shut off when the kickstand is up?
This usually means the kickstand switch is stuck or misaligned. The bike thinks the stand is still down, so it kills the engine. Cleaning or replacing the switch typically fixes this problem quickly.
How much does it cost to replace a Harley kickstand switch?
An OEM kickstand switch costs between $15 and $40. Aftermarket options are often even cheaper. The replacement is a simple 15-minute job that most riders can do at home.
Can a bad kickstand spring cause the engine to stall?
Yes, indirectly. If the spring is too weak, the kickstand may not fully retract, leaving the switch partially engaged. This can confuse the electrical system and cause stalling while riding.
Is it safe to ride with a wobbly kickstand?
No, a wobbly kickstand can fold unexpectedly while parked, causing your bike to fall. It can also indicate a cracked bracket or worn pivot that may fail under load. Fix it before riding.
Do all Harley-Davidson models use the same kickstand switch?
No, different models and years use different switches. Always check your owner’s manual or consult a Harley dealer to find the correct part number for your specific bike.
How often should I inspect my Harley kickstand system?
A quick visual check before every ride is ideal. A thorough inspection of the spring, switch, and bracket should be done at least once a month, and before the start of every riding season.
=== CONCLUSION ===
Harley-Davidson kickstand problems do not have to ruin your riding experience. With the right knowledge, you can tackle most issues yourself and keep your bike running safely. Remember to inspect the switch, maintain the spring, and listen for unusual sounds. These small habits add up to big reliability gains over time. Share this guide with fellow Harley riders, and help the community stay rolling strong on every ride.